
A few months back, we tested to find the best framing nailer. We also compared the best air compressors. We had a good time, but every single one of the pneumatic models would be useless were it not for the unsung hero of that particular shootout: the air compressor. Not everyone knows how to use an air compressor properly, however. In this entry into our Training the Apprentice series, we cover the basics.
Framing nailers aren’t the only tools that need pneumatic (air) power to function. Rather than running off of electricity, many tools in both the Pro and DIY arsenal run off of compressed air. Compressed air plays a big role in construction, automotive, and painting applications. In short—don’t skimp on this tool!
If you’re just learning how to use an air compressor, don’t stress out. It’s effortless to pick up, and once you go through the process a few times, it will seem like second nature.
Editor’s Note: Be sure to also check out our recommendation for the best portable air compressor for your home garage
Table of Contents
- How to Use an Air Compressor – Initial Setup
- Using a Gas-Powered Air Compressor Requires Fuel
- When Using an Electric Air Compressor, Watch Your Cord Length
- Attach Your Hose to the Regulator
- Test the Safety Valve
- Turn the Compressor On and Fill the Tank
- Adjust the Air Regulator
- Know Your Duty Cycle Rating
- Maintaining Your Air Compressor
How to Use an Air Compressor – Initial Setup
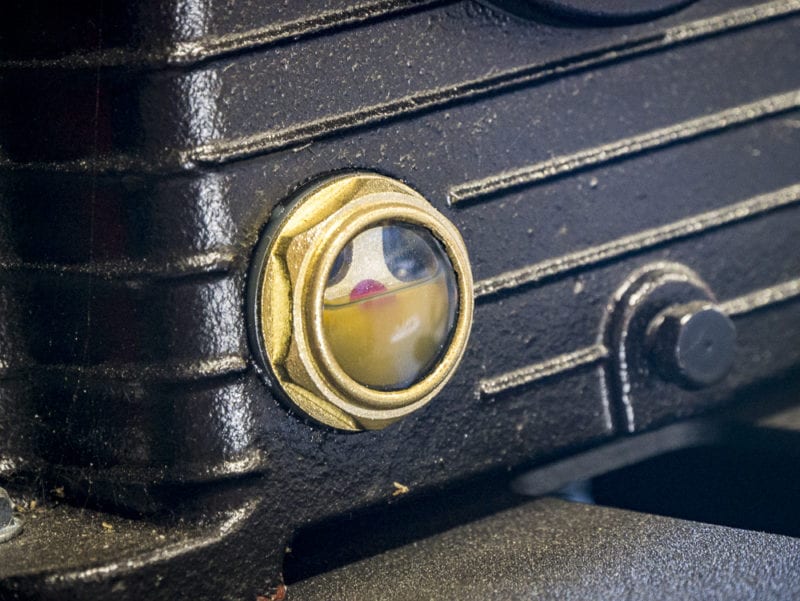
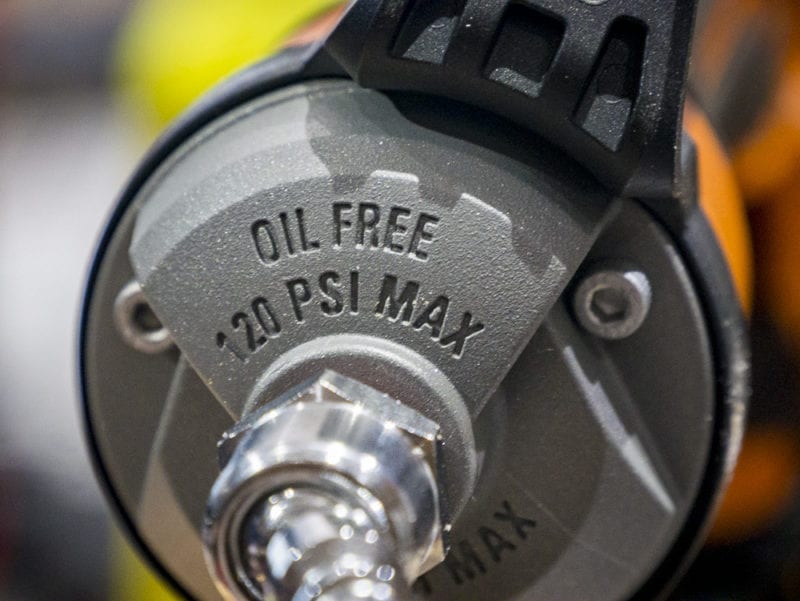
Let’s start with checking the oil. Most smaller air compressors these days won’t require oil to operate, but the bigger ones probably will. No matter the size, before you fire up your air compressor, check the manual to ensure your compressor uses oil and where it is located.
Chances are good that if your compressor does need oil to function, you’ll find the dipstick near the bottom of one of the compressor’s ends. Pull it out, and just like with your car’s engine oil, check the oil level. Add more if it’s getting low.
In some cases, such as with our 80-Gallon NorthStar compressor, the manufacturer provides an easy-to-read window into your oil reservoir. Compressor oil can be found at most hardware, auto parts, and home improvement stores.
Using a Gas-Powered Air Compressor Requires Fuel
When you’re using a gas-powered air compressor, try to use ethanol-free gasoline or something like TruFuel premix. It will help your compressor last longer. If you absolutely must use regular gas, add an ethanol-specific fuel stabilizer, such as Stabil, to it.
You also might need a break-in period for it to run optimally. Check the manual to see what kind of break-in procedure you should use on a new compressor. A good rule of thumb is to open the drains and then let the air compressor run for 30 minutes.
When Using an Electric Air Compressor, Watch Your Cord Length
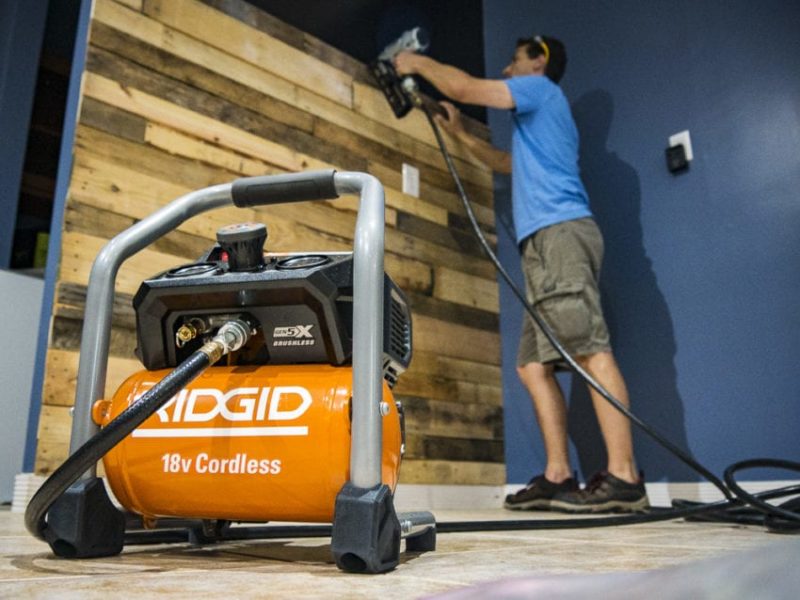
Obviously, an electric air compressor requires power—so plug it in. When you can, avoid using extension cords on AC models if there isn’t a working outlet near where you intend to work. The wrong extension cords can cause the compressor to overheat. It’s better to connect multiple air hoses together to get air to your tool.
If you don’t know what kind of extension cord will work for your air compressor, check out our extension cord size chart for reference.
Attach Your Hose to the Regulator
Attach your hose to the regulator valve. That’s the valve next to the pressure gauge on the compressor. This part ought to be pretty easy to figure out, but your hose will have a male connection while your compressor will have a female plug.
You’ll need to slide the moving part of the coupler in to allow the hose end to connect. If the compressor has air in it, some will release as you lock the hose in place and you’ll feel it push back.
On the other end of the hose, you’ll have that same type of female plug. The tool has a male stem that attaches to the adapter on the end of the hose.
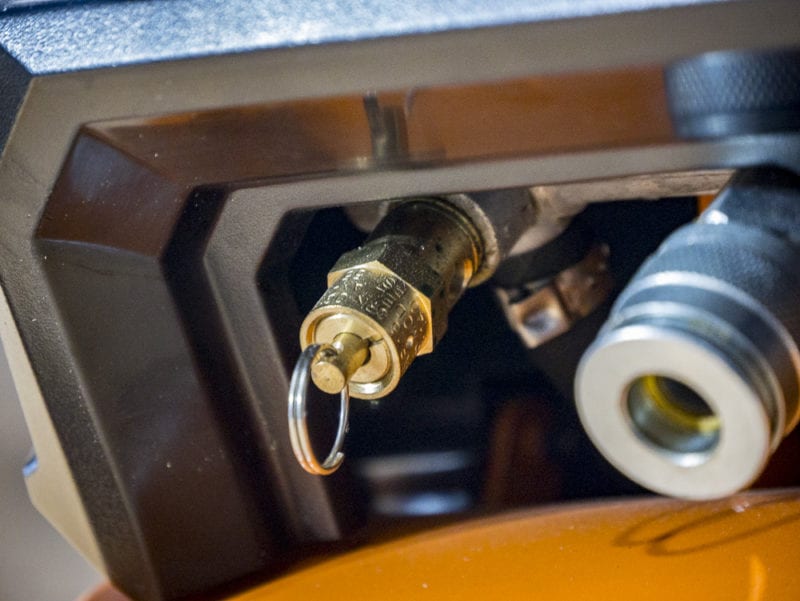
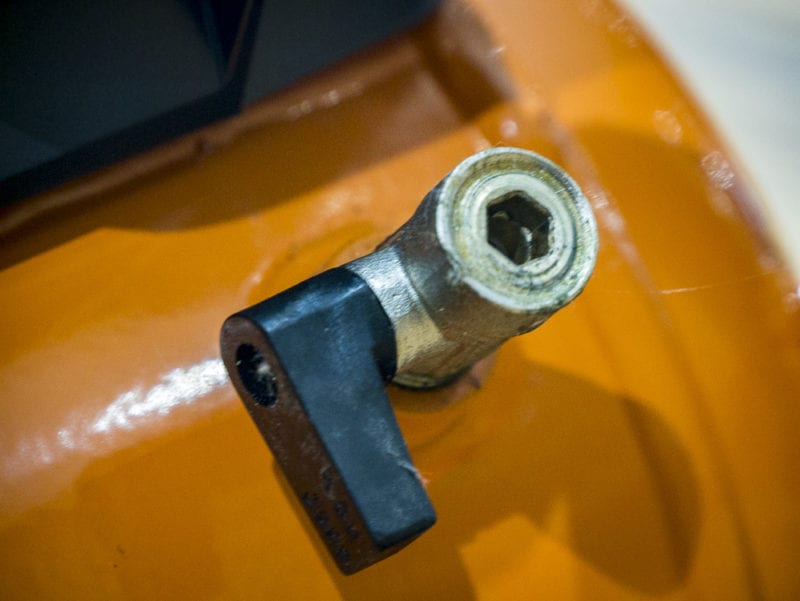
Test the Safety Valve
Pull the safety valve. You should be able to find it near the hose line. If you pull it and hear air hissing, you’re in good shape. Push the valve back in place before starting up the compressor. If you don’t hear air escaping, but can put the valve back in place, you’re probably still good.
Turn the Compressor On and Fill the Tank
Turn the compressor on and wait for the tank to fill up. You’ll know that you’re ready to get to work when the needle on the tank pressure gauge stops moving forward and the motor stops.
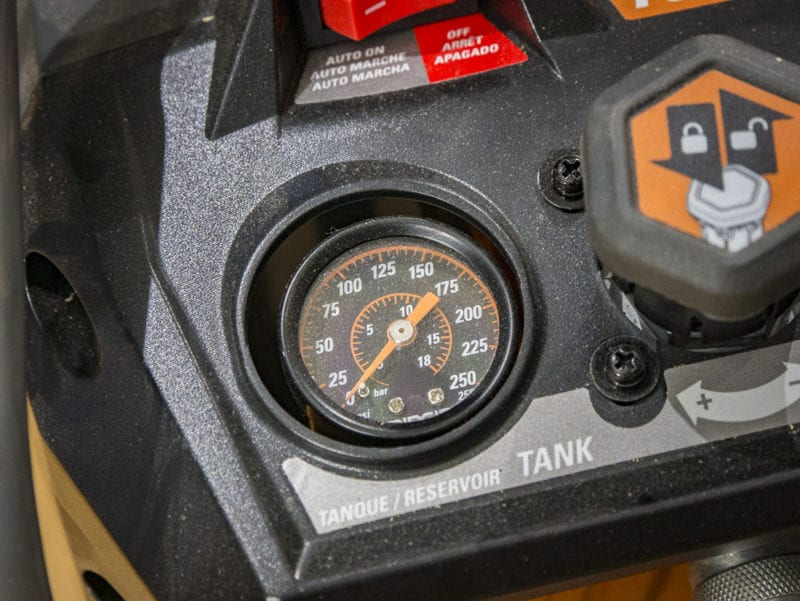
Figure out how much air pressure your tool needs to operate properly. Usually, this information will be printed on the underside of the tool. If you can’t find it on the tool, the manual will definitely have that information available. Every tool has a different PSI rating, so when you switch tools, you’ll need to adjust the hose pressure as well.
PSI isn’t the only consideration, though. You’ll also want to check the SCFM requirement, or how much airflow the tool needs. Tools like nailers just need a quick burst of air while something like an air sander requires constant airflow at a high level.
Adjust the Air Regulator
This next step requires you to adjust the regulator knob. One way (usually clockwise) will give you more pressure while the opposite direction will lower it. It only takes a few seconds for the compressor to stabilize. Don’t be afraid to make small adjustments until you get it where you want it.
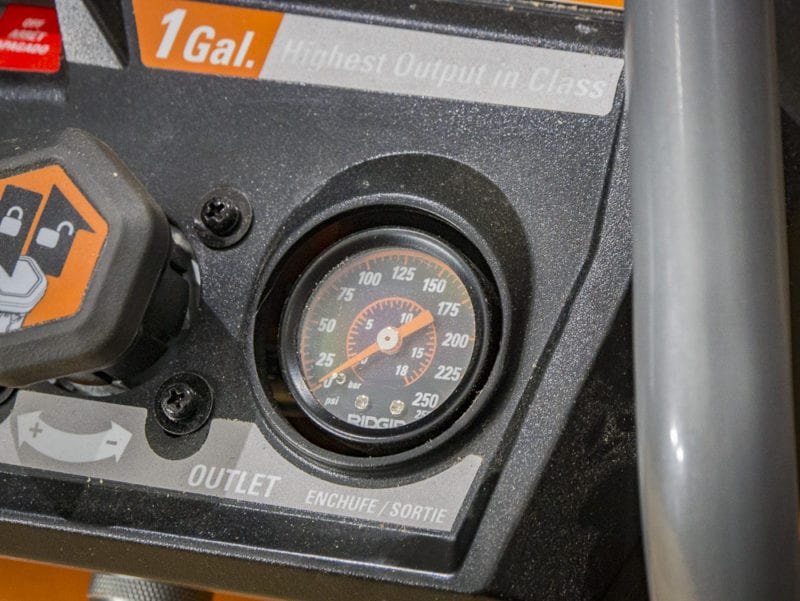
Every time you use your power tool, the tank’s pressure will drop as that compressed air goes through the hose to your tool. When the pressure in the tank drops too low, the compressor will kick back on, refilling the tank.
PSI isn’t the only consideration, though. You’ll also want to check the SCFM requirement, or how much airflow the tool needs. Tools like nailers just need a quick burst of air while something like an air sander requires constant airflow at a high level.
Know Your Duty Cycle Rating
Every compressor has a duty cycle rating. That’s the work rate the motor can handle without risking damage. Some compressors can have a 100% duty cycle, meaning you can use it all day without a break if you want.
Others might have a 50% duty cycle. If you use it for 5 minutes, it needs a 5-minute break. Often, air compressors that have a duty cycle of less than 100% will tell you specifically how much time it can run (like 10-minute intervals).
Maintaining Your Air Compressor
You need a break at the end of the day and your compressor needs to decompress as well.
Drain the Tank
When you finished your work, you’ll need to open the drain valve on the underside of the tank to release any moisture. This needs to happen after every use, as water and metal typically don’t get along for long periods of time. Where we are in Central Florida, there’s a little bit of salt that’s in the air, accelerating the rusting process. Since the rust starts on the inside of the tank, it’s not something you’ll notice until you start getting brown water coming out.
Turn off the compressor first. When you open the drain valve, the escaping air will also push any moisture collecting around the bottom of the tank out. Alternatively, turn the pressure regulator knob to switch off the hose’s air supply and turn off the compressor. Then, wait for the pressure to leave the compressor. You can pull the pressure relief valve to release the air faster. This won’t release the moisture, though.

Keep an Eye on the Air Filter
Get into the habit of checking the air filter every time you use it. Too much gunk begins to starve the motor and can cause it to fail. Replace it when you start to see a significant amount of build-up on it.
Check that Oil One More Time
After you’ve finished storing away hoses, take this opportunity to check the oil again, and replace it if it’s dropped too low. Once a year, you’ll want to replace the oil altogether. Consult your manual for the best way to go about this.
Air Tanks Have a Lifespan
Air compressor tanks have a limited lifespan. While draining the tank will help extend it, it will still eventually be at risk for bursting. Check the data label to see when you should replace the air tank.
Finally, if you have any tips or tricks for how to use an air compressor, feel free to add them to the comments section below.
